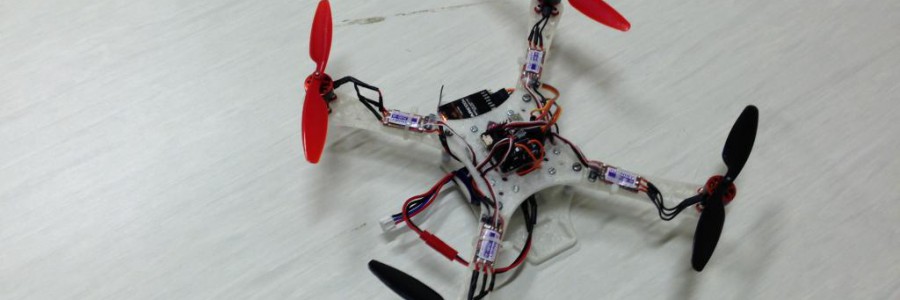
First 3D printed quadrotor, very very similar to TEGO 1, same motors and ESC, just different frame. First one to be flow with the computer, making use of the multiwii serial protocol, and a computer joystick. The post is here.
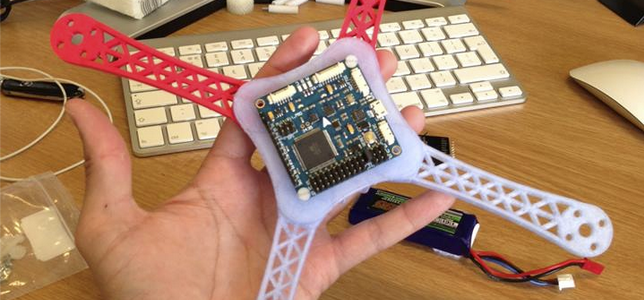
This is yet another version of a 3D printed quadrotor, pointed to be one of the workhorses of my research… The main characteristic of this frame is that instead of using nut and bolts to join the arms and the base together, like in TEGO v2, I’m using Rotite®s!!!!
Designing arm
Printing arm
Baseplate
unlocked
base and arm
For those who don’t know what rotites are, you can give it a pick here, I was trying to find a solution to reduce weight of my previous TEGO v2 frame, and somehow I found this company, I immediately put in contact with them, and after several e-mail exchanges, phone calls and even videoconferences with the inventor, I was able to get my hands on some of their designs, there is a picture below where Stuart is giving me a lecture about Rotites.
So, I started playing in Solidworks, in conjunction with my favorite Industrial Designer, that was visiting me (it was on summer ), and we did this design, using 90 degrees A and B rotites, 4 B’s on the main plate and one B on each arm.
Then I order some more ESC and motors, exactly the same as the ones on TEGO v2, and put everything together. But… I did a critical mistake when soldering the motors, and it wasn’t flying, but, using the resources around me (undergrads, hehehe) I “kill to birds with one shot”, so, I teach them how to solder and the quad-ESC-motors basics, then we re-solder the motors and voila!!!! TEGO v3 is flying. Dont forget to check the video!!!
The weight was dramatically reduced, and the endurance dramatically increased!!!
Many thanks to Stuart Burns (inventor of Rotite®) and of course, the Rotite® company to letting me use their designs 🙂
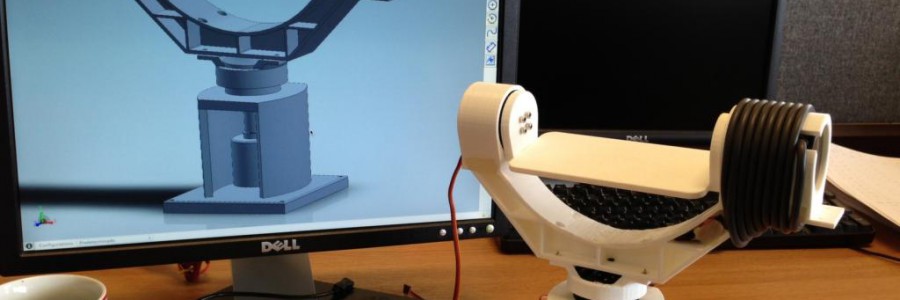
For my project I need to design and build a two axis mechanical gimbal… A gimbal is a pivoted support that allows the rotation of a object on a axis, in this case, the object it will be a laser and a camera, and it will allow them to move in two axis, with the purpose of tracking and pointing a multicopter on flight. The gimbal will be part of the ground station.
1
2
3
4
5
Fortunately I received help from a very special person (TEGO), nothing more and nothing less than an excellent industrial designer, hehehe, so, after dealing with all the STL files, corrections and adjustments, we proceed to the printing stage.
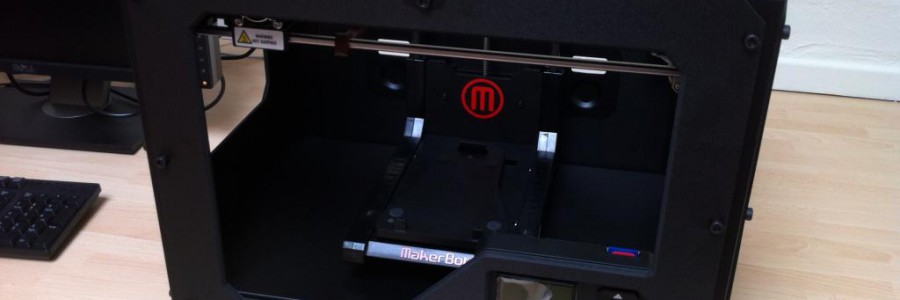
I must say that this stage was really really difficult, the Replicator 2 wasn’t cooperative enough, lots of material and man-hours were lost. After a very nice conversation with the excellent technical support of Makerbot, they send me (free of charge) a extruder upgrade for my Replicator 2. After waiting 1 week to arrive (meanwhile I was being attack by swans on Loch Ness BTW) I proceed to “upgrade” my replicator and voila!!!! it worked perfectly!!! I was able to print again all the gimbal parts with close to little effort.
Very tired
All the parts
And then proceed to test the controller and the hardware, in the video you will see the gimbal being stabilised by a IMU and some open-source software, and I’m happy to say that, is working. So, the next step is to start flying things above the gimbal and see if its capable of keep pointing and tracking.
At the department in the University we require to build all sorts of stuff, so, I made the casual suggestion of acquiring a nice 3D printer, and… My wishes became true!!! Now the SAS group (Simulation and Autonomous Systems) has a nice Makebot Replicator 2, and that makes me super super happy!!!
It was my task to unbox, calibrate and test this impressive machine, I´m really amazed with the quality of the finished products…
So, I did this small timelapse video of the Replicator doing a screw and nut. For the interested people, the timelapse was 20 minutes on 40 seconds.
Then we print a comb… Murray started to brush little Ed. Enough said.


 ), and we did this design, using 90 degrees A and B rotites, 4 B’s on the main plate and one B on each arm.